2024-06-05Last updated
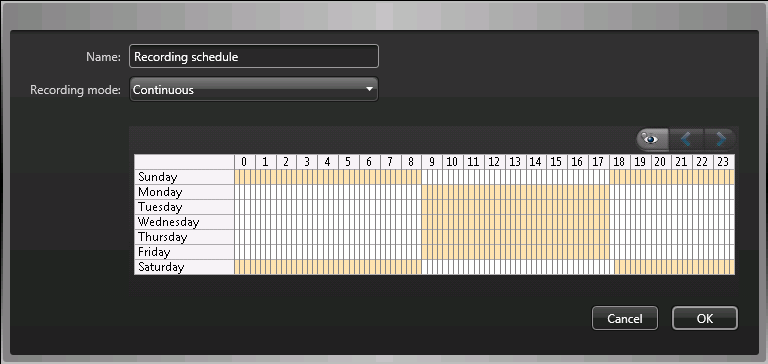
Create custom recording schedules from the Security Center installer assistant to have cameras
record in different recording modes for a specific time range.
Procedure
-
On the Recording settings page, click
under
Recording schedule.
-
Enter a name for the new schedule.
-
From the Recording mode list, select one of the
following:
- Off
- Recording is off.
- Continuous
- Cameras record continuously. This is the default
setting.
- On motion/Manual
- Cameras record when triggered by an action (such
as Start recording, Add bookmark, or Trigger alarm), by motion detection, or manually
by a user.
- Manual
- Cameras record when triggered by an action (such as Start recording, Add bookmark,
or Trigger alarm), or manually by a user.
Note: When the
Manual setting is used, then motion does not trigger any
recording.
- Custom
- You can set a schedule for when recording occurs.
-
For each day of the week, specify the time range for recording:
- Click and drag to select a block of time.
- Right-click and drag to clear a block of time.
- Use the
cursor
keys to scroll through the
24-hour timeline.
Tip: To switch to high-resolution mode, where each block represents
1 minute, click
.
Example
The following example shows a schedule where recording occurs continuously from
6:00 pm to 9:00 am on weekends and from 9:00 am to 5:00 pm on weekdays.