
Resetting the software image on a Streamvault workstation or server appliance
2025-08-21Last updated
After you have prepared a bootable USB key that has the required Streamvault™ software image, you can use it to reset the software image on a workstation or server appliance.
Before you begin
What you should know
- Resetting doesn’t affect the factory default RAID drive settings.
- Resetting might fail if the hard drives, RAID drives, or partitions on the appliance have been changed from the factory default settings. In such a case, contact the Genetec™ Technical Assistance Center (GTAC).
Procedure
To reset the software image using
the Streamvault factory reset utility:
-
Click Factory reset OS (C:).
 A Command Prompt opens and the Streamvault factory reset utility analyzes the system to detect the system (OS) drive.
To reset the software image using the
Windows Setup wizard:
-
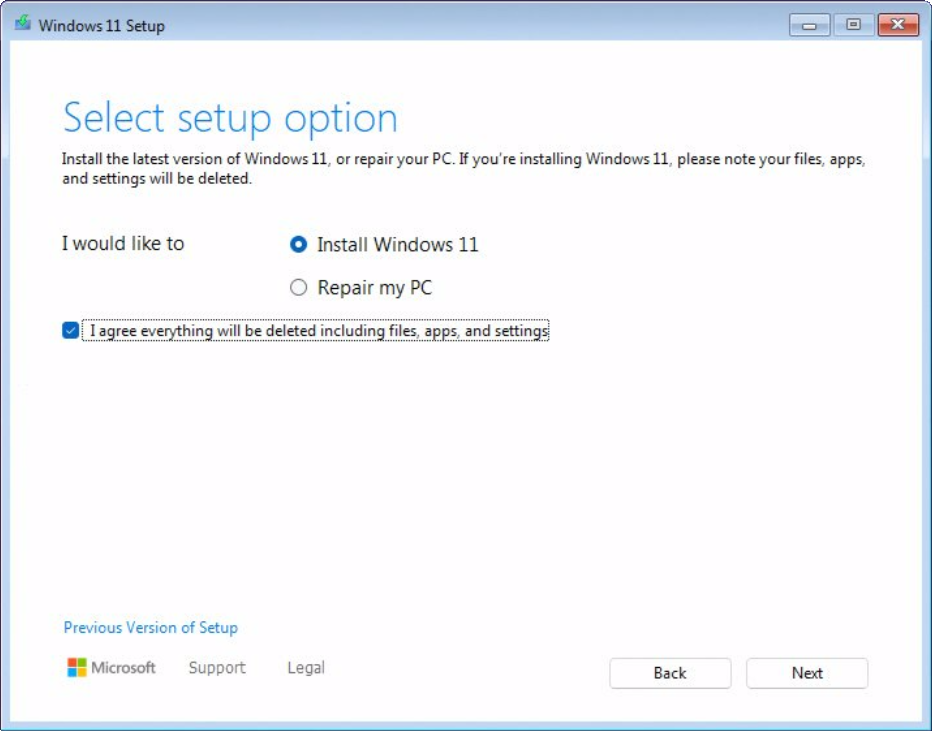
On the Select setup option screen, select Install
Windows X, where X stands for the Windows version you're installing.
Acknowledge that your files, apps, and settings will be deleted and click
Next.
Note:The video archives stored on the secondary video disk aren't affected. Only the files on the OS disk are deleted.
-
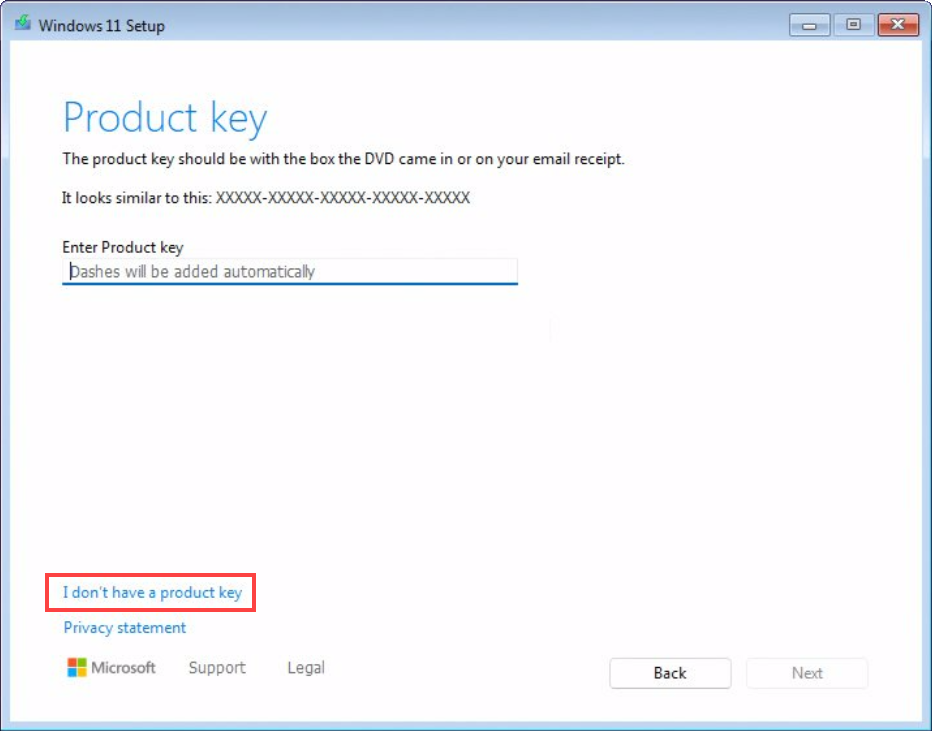
On the Product key screen, do one of the following:
- If the appliance is connected to the internet, click I don't have a product key to continue. The appliance automatically retrieves its activation data from Microsoft.
- If the appliance isn't connected to the internet, enter the product key that is located on the Certificate of Authenticity (COA) label affixed on your appliance and click Next.
-
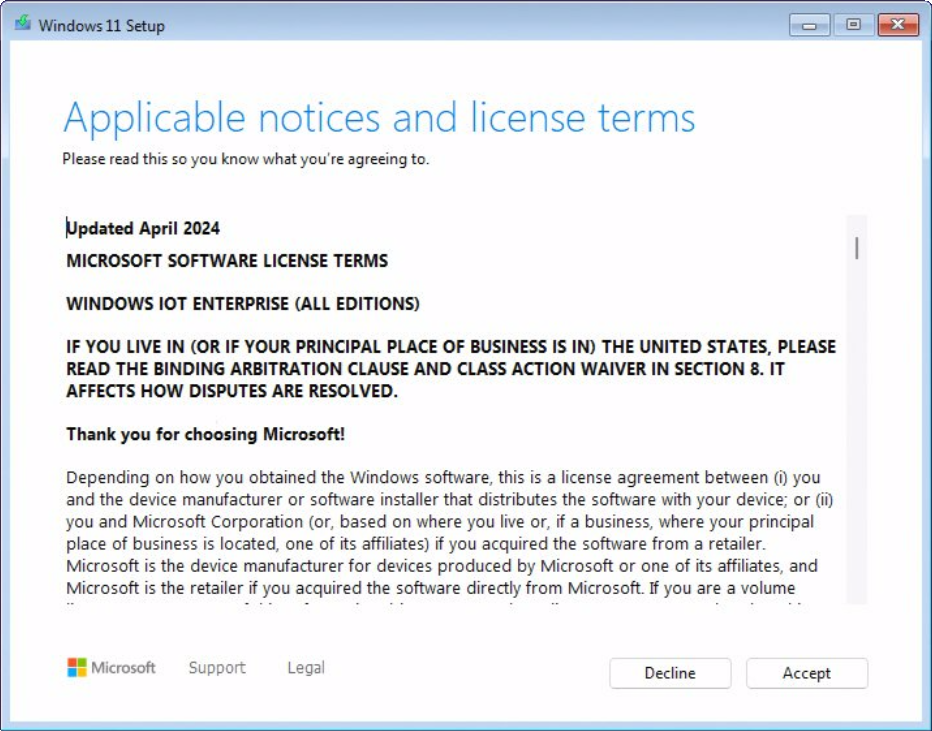
On the Applicable notices and license terms screen, read the
license terms and click Accept.
-
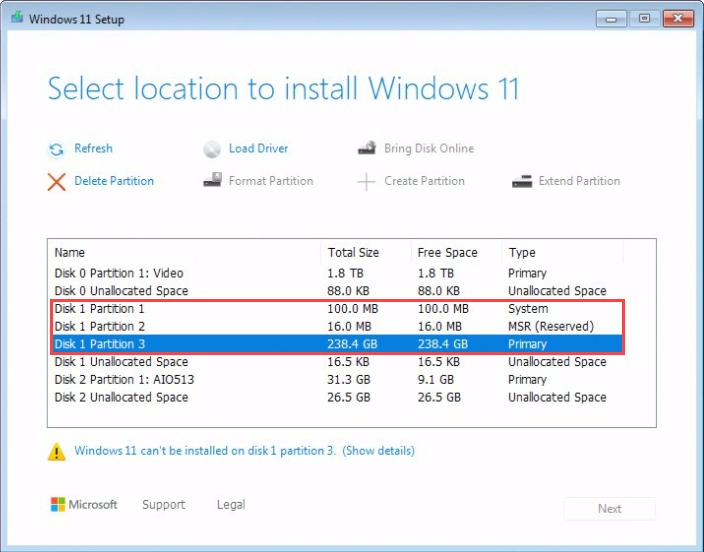
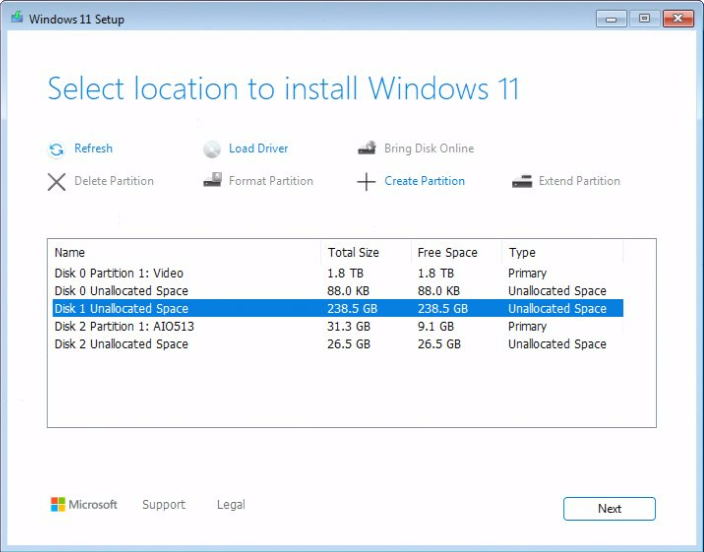
On the Select location to install Windows X screen, delete the
primary, system, and MSR (if applicable) partitions on the OS disk.
Only unallocated space will remain on the OS disk, and the Windows setup wizard will automatically recreate the deleted partitions during the installation process.CAUTION:The primary partition on the OS disk is typically less than 1 TB in size. Do not delete the primary partition on the video storage disk, which stores your video archives.
-
Select the unallocated space on the OS disk and click
Next.
-
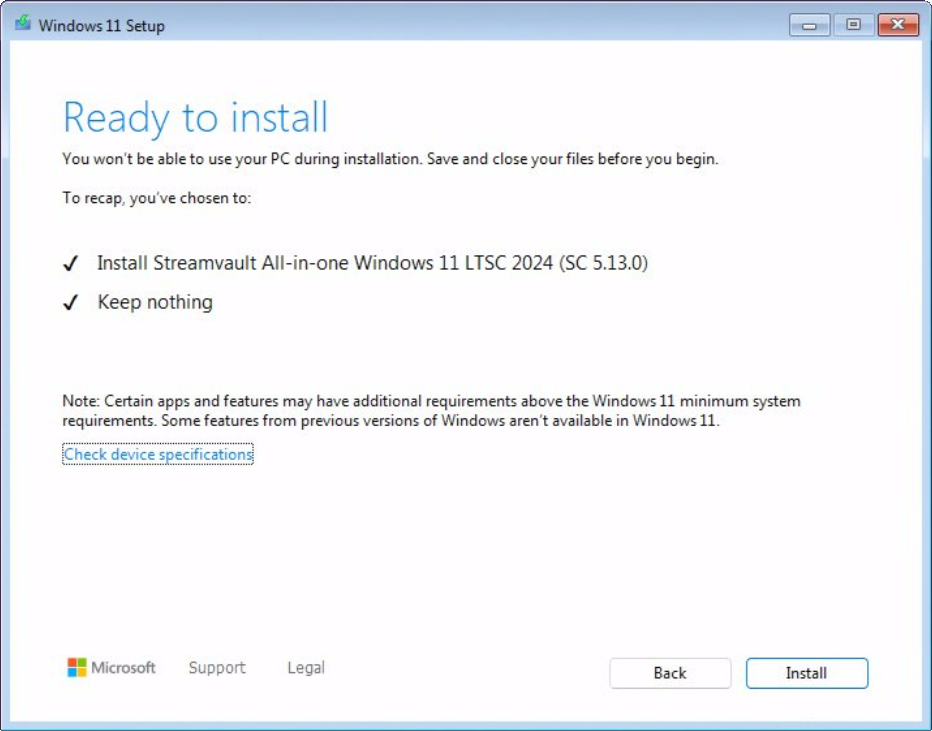
On the Ready to install screen, click
Install.
Example
Watch this video to learn how to reset the software image on a Streamvault workstation or server appliance.
After you finish
- Log on to Windows using the default username and password that are on the sticker adhered to the appliance.
- Activate your Security Center license.
- If you backed up Security Center configurations before the factory reset, restore the configurations using the SV Control Panel.
- Reconfigure your appliance.